Sonntag, 23. Januar 2011

Get a free S/MIME certificate for email encryption

This post describes how to obtain your personal email certificate that can be used to receive encrypted mail and to sign outgoing emails. You should never send confidential informatin via email since it can be read by any ISP and mailserver administrator on its way.

There are several providers for free S/MIME certificates. We’ll be using Trustcenter “Internet ID”. The good thing about this certificate is, that it’s valid for 1 year and it contains your real name. Some others issue only generic certificates without names.

1. Sign up

Navigate to the trustcenter certificate wizard.

This wizard is also available in german.

image

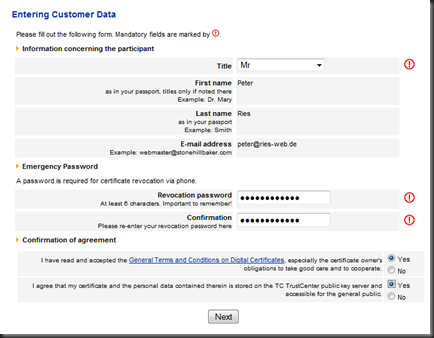
Fill your personal details. Press next


image

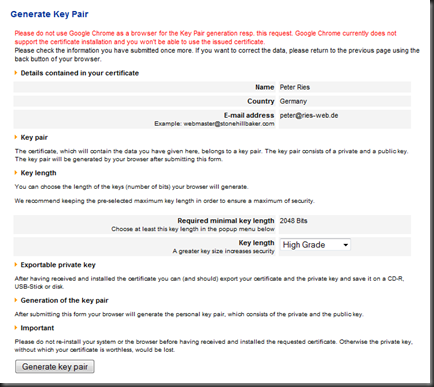
Select “High Grade” for key length and press “Generate key pair”


image

The key generation takes a few seconds. After that, fill the additional fields. The revocation password can be used in case you lose your certificate in order to “delete” it. Choose a strong password. Prexx “Next”


image

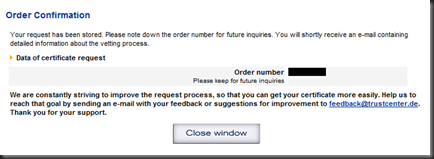
You order is confirmed.


2. Confirm your email address

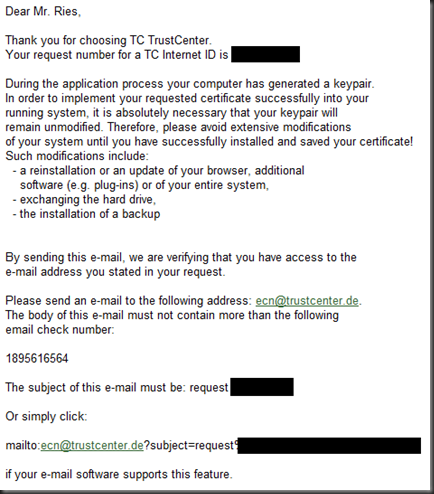
Now check your emails. You should receive the followigng email

image

Follow the instructions in the email and reply.


3. Install the certificate

A few minutes later you’ll receive another email. This one contains a summary and a link to install the certificate. Click the link. Note that the link must be opened in the very same browser that was used to generate the key

image


You’ll see the following page if everything went fine.

image

Click “Install certificate”


4. Backup the certificate

The certificate is now stored in your browser’s certificate manager. It’s a good idea to export it for backup purposes. You’ll need to import the file if you want to use the certificate for email applications.

Navigate to Tools –> Options –> Advanced

image

Click “View Certificates”
You should see your certificate in the tab “Your Certificates”

image

Press “Backup…”
The file you’re about to export is secret. You should protect it with a strong password.

image

Done! You exported a PKCS#12 file which can be used with your email clients. Check my other posts for instructions.

Montag, 3. Januar 2011

Creating a PKCS12 certificate for free


If you want to experiment a little with PKI (public key infrastructure), SmartCard technology and other securty-related topics, you can create a certificate for yourself for free. Here is how it works.


Installing XCA

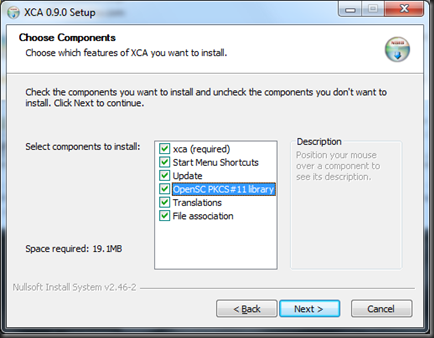
XCA is a great software to manage everything related to certificates. Just download and install it.
image

It’s a good idea to install all modules.


Creating a Certificate Authority

We want to do things right, so the 1st thing we need is a certificate authority. The authority can issue and revoke certificates. As soon as it comes to advanced tasks, we’ll need it anyway. Creation is easy, so let’s go.

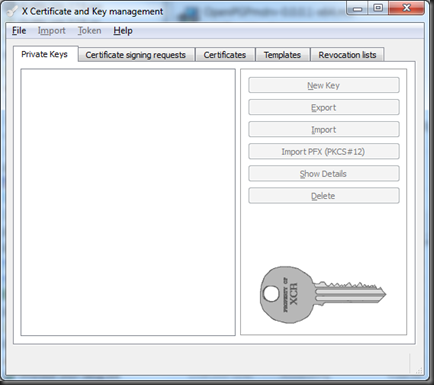
Start XCA
image


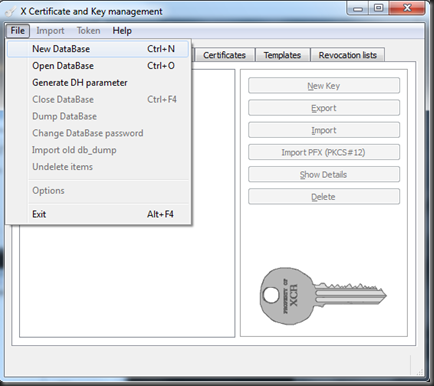
Create a new Database

image


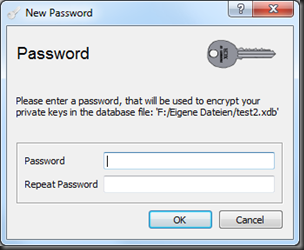
This is going to store all your valuable certificates, so give it a good password. I recommend to store the database file on an external flash drive and to keep it in a safe place as long as you don’t use it.
image


Press “New Certificate”

image


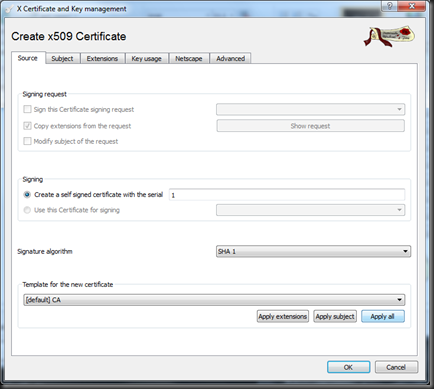
Select “[default] CA” as template and press “apply all”. This will fill all the advanced fields to create a CA (certificate authority) certificate.
image


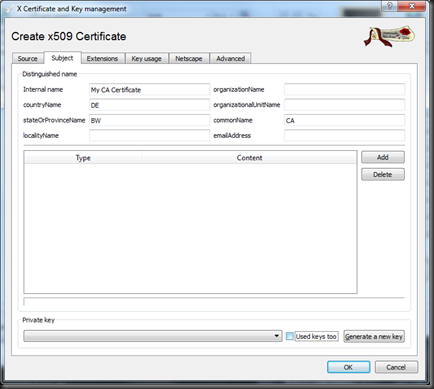
Enter a meaningful name for “internal name”. This name is used only within the XCA application, so it’s just for you.

You should definily fill the commonName. This is showen as the certificate name everywhere you’ll be using it. You can name it “yourdomainname.com CA” for example.

Every certificate needs a key pair, so please generate one pressing “Generate a new key”
image


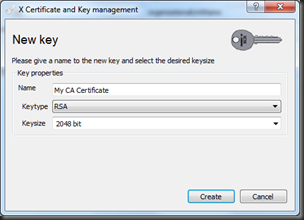
Select “RSA” and 2048 bit as keysize. Those settings are recommended if you want to load your certificate to a SmartCard later on.
image


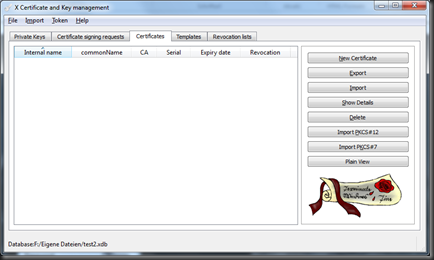
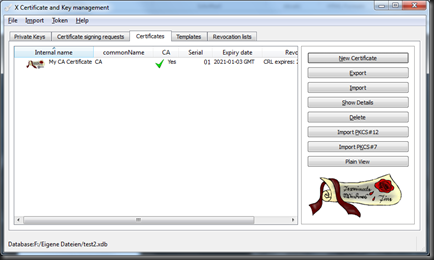
Done! Now we have the CA created as you can see.

image


Create Personal Certificate

Usually we’d now create a bunch of certificates. One for email encytion, one for VPN, one for Windows Logon, one for …

This is useful since they are independant and for example you can revoke them individually if something should go wrong. Anyway, we’ll do the bad practice and create just one “universal” certificate being capable of everything.

Press “New Certificate” again.
image

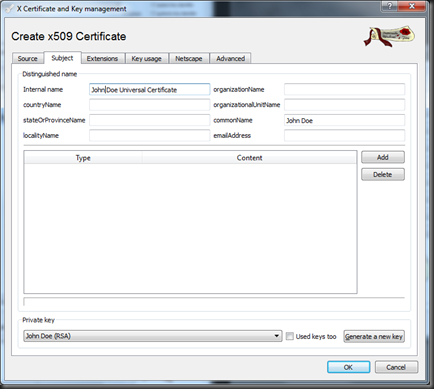
This time, we don’t apply a template but switch to the Subject Tab right away. Enter the internal name and common Name. This time, you should name it after your First and Lastname to indicate, that this is your personal certificate. Also, generate a new RSA, 2048bit key for this certificate.
image


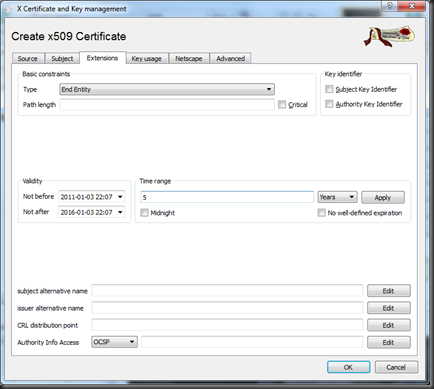
In the “Extensions” Tab, you might want to extend the validity to 5 years. Expiration increases security in case you lose your key or it’s compromised. Then press OK
image


In the “key usage” tab, select all entries in both columns. This ensures that you’ll have no restriction. Again: this is bad practice. If you want to do it right, create one certificate per application and assign rescricted key usage permissions.

Press OK

image

Done! You can see in the certificate chain, that your personal certificate.

Exporting your personal certificate

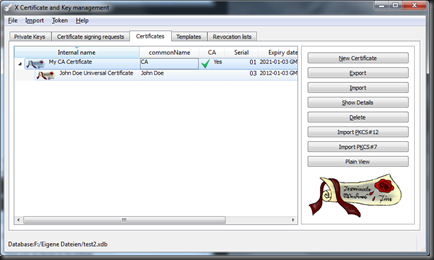
Now select your personal certificate and press “Export”
image


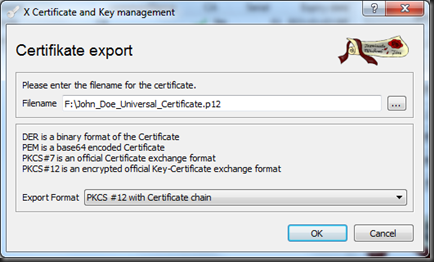
The correct exort format is “PKCS #12 with Certificate chain”. This format includes

  • your personal key pair (public and private)
  • your personal certificate
  • all parent certificates up until the root CA certificate
 

image


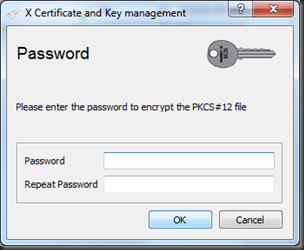
To protect your keys, the file is encrypted by a password. Whenever you want to use your certificate, you need to enter the password.
image

Keep the exported file in a safe place. Even if it’s password protected, make sure noone else but you can access it. The safest storage is on a SmartCard.

Exporting the CA certificate

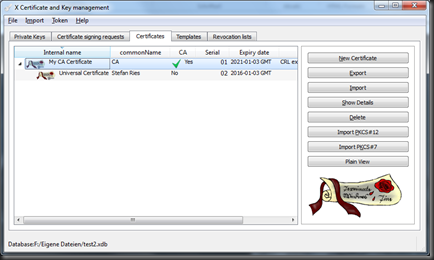
For advanced applications, you’ll need to have the CA certificate. That’s why you should export it. Select it and press “Export”
image


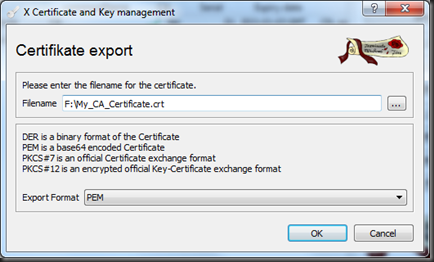
It’s very important to understand that we don’t export the CA’s private key now. It remains within your XCA database only and can only be used for certificate creation. Our export contains the public key and the certificate only. This is enough for other applications to verify, that our personal key was signed by the CA. That’s all they need.

Select the export format PEM and press OK
image


Summary

You created

  • a XDB Database that should be stored in a safe place, offline.
  • a P12 Certificate file that contains your password-protected secret key
  • a CA certificate file that does not contain any secrets

SmartCard Login in Windows 7

Logging in with a smartcard to windows is usually supported ony for enterprise installations based on a domain controller. If you want this feature at home, all you need is the open source software EIDAuthenticate, a SmartCard including the driver (middleware) and a certificate. I recommend the Gemalto .NET IM V2+ SmartCard and a Certificate from StartSSL.

Installing the Software

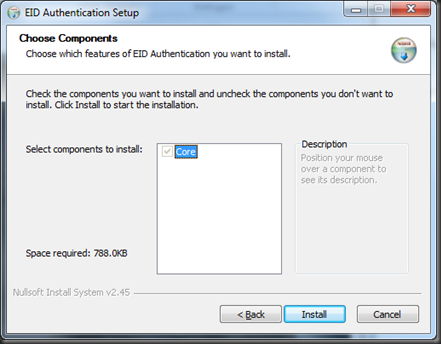
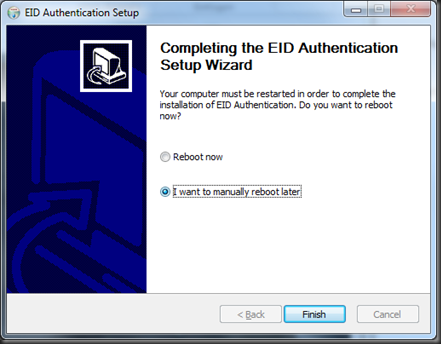
Just download and install the latest version of EIDAuthenticate. Walk through the installer

image

image

image

Setting up the certificate for logon

Reboot your PC. After boot up, enter the control panel and open “Smart Card Logon”

image


Select “Use Preconfigured Card”

image


The dialog lists your all certificates on the card. You might not have a certificate on the card, the certificate chain is not complete or the EKU (Extended Key Usage) is not okay. In those cases it would be better to genereate a new certificate which allows SmartCard Logon.

image


Once you have the certificate on the card, you must import the issuer CA certificate as trusted in the windows certificate store. This will make all certificates issued by that CA trusted by windows. To do that

  • Start Menu, click Run… and type mmc
  • In MMC, File->Add/Remove Snap-in… and click the Add button
  • Select Certificates from the list of snap-ins and click Add.
  • Choose the Computer Account radio button. Click Next and then Finish.
  • Right click on the Trusted Root Certification Authorities folder and choose All Tasks -> Import… to bring up the Certificate Import Wizard.

The Certificate Import Wizard will walk you through the process of selecting a certificate file and adding it to the store.

Enter the Smart Card Logon settings again and your certificate will be showen as trusted.

Press Continue

image


Type your password and press finish. If you like the smartcard signon, you can later select to allow logon only with smartcard.

image


Finally, enter your SmartCard PIN.

image


Done! On next login, you can sign on with the smartcard.

Sonntag, 2. Januar 2011

Change domain IP address in ispCP

If you run multiple domains on ispCP and you want to run some domains on a different IP address, here’s how you do it.

Adding the IP in the admin console

Log in to your ispCP admin account. Navigate to

Settings –> Manage IPs

Add the new IP address and the domain you’re intending to use it for.

Mapping the IP to the domain

This must be done manually. Log in via SSH to your server. Connect as root user to your MySQL console using

mysql –u root –p

You need to enter your mysql root password now. If you don’t remember it, you might be able to recover it. Once logged in, list all your databases using

show databases;

Identify the ispcp database, mine was named “ispcp_database”. Then, select that database

use ispcp_database;

If your ispcp database is named differently, replace “ispcp_database” with your name. Next, list the domain / IP mapping

select domain_name, ip_number FROM domain d RIGHT JOIN server_ips ip ON d.domain_ip_id=ip.ip_id;

You’ll see a list of all domains now and their IP addresses. You should have the domain name NULL mapped to the newly added IP. This means, that there is no domain assigned to it, yet. To assign the domain, run the following query

update domain SET domain_ip_id=(select ip_id from server_ips WHERE ip_number="1.2.3.4"), domain_status="change" where domain_name="example.com";

Replace the red strings with the IP address and the domain name you’d like to assign. To double-check that it worked correctly, list all assignments with the following query

select domain_name, ip_number FROM domain d RIGHT JOIN server_ips ip ON d.domain_ip_id=ip.ip_id;

Exit MySQL.

The next step will overwrite the ispcp configuration and all custom changes it might include. Please backup your ispcp.conf before proceeding. When done, run the update script

cd /var/www/ispcp/engine/setup/
perl ispcp-update

Print out MySQL root password

If you have forgotton your MySQL root password but you are using IspCP, you got luck. Create the following pearl script in the folder /var/www/ispcp/engine

#!/usr/bin/perl

use FindBin;
use lib "$FindBin::Bin/";
require 'ispcp_common_code.pl';
use strict;
use warnings;

my ($rs, $rdata) = (undef, undef);

my $current_db_pass = undef ;

if(exists  $main::cfg{'DATABASE_PASSWORD'} && $main::cfg{'DATABASE_PASSWORD'}) {
    $current_db_pass = $main::cfg{'DATABASE_PASSWORD'};
} else {
    $current_db_pass = '';
}


($rs, $current_db_pass) = decrypt_db_password($current_db_pass);   

print STDOUT $current_db_pass;

Make the file executable and run it. It will print out your root password. Please not that this only prints the password stored encrypted in the ispcp settings.

Wordpress installation

Wordpress is a very comfortable, powerful and user-friendly blog system. It’s currently the best IMHO. Here’s a recommendation how to make the basic installation even more powerful using plugins.

Embedding Flash Videos

Embedding Flash videos with the Flash Video Player which is based on the famous JWPlayer. To embed a video in your Article, just insert

[flashvideo file=video/video.flv /]

Securing your Blog

Force Login

If you don’t want all blog posts to be public to everyone, the following plugins are for you. A 100% private blog needs the Force User Login plugin. This will give you the login dialog right after you enter the blog. Users need to register in order to see anything. The plugin comes with only one PHP file which can be edited to define the landing page after successful login.

Content Control

If you want the full control, you should install the Social Privacy for wordpress. It comes with a set of plugins to

  • restrict users to see only defined article categories
  • support permission-based RSS feeds
  • send out email notifications to subscribers based on their permissions

It gives you great control to allow users to read only posts they should be.

Single Sign On with OpenID

Some users might be annoyed to create a new account on your blog. The OpenID plugin helps. Users can login to your blog using any OpenID provider. Providers are for example Google Mail, Yahoo, MySpace and many more. After you installed the plugin, your login dialog is extended by the following line.

image

An OpenID is a URL. If you want to to login with your GMail account for example, put the following URL in the field

www.google.com/accounts/o8/id

During the login process, it will redirect you to the GMail login page and ask for confirmation.

Image Gallery

NextGEN Gallery is a great image gallery plugin. You can create galleries by uploding zip files or bulk-uploading images via Flash-Uploader. It automatically creates thumbnails and resizes the images if needed. Easily include slideshows, albums, image lists into your posts. Absolutely hassle-free.

Sending Welcome Emails

The SB Welcome Email Editor allows you to change the ugly default mail that wordpress sends out when a new user registers.